
Printing Around Windows, Doors and Switches: Plan the Artwork First
How to plan wall printing around windows and doors: measure openings, set safe zones and crop lines, handle switches and choose designs that adapt.
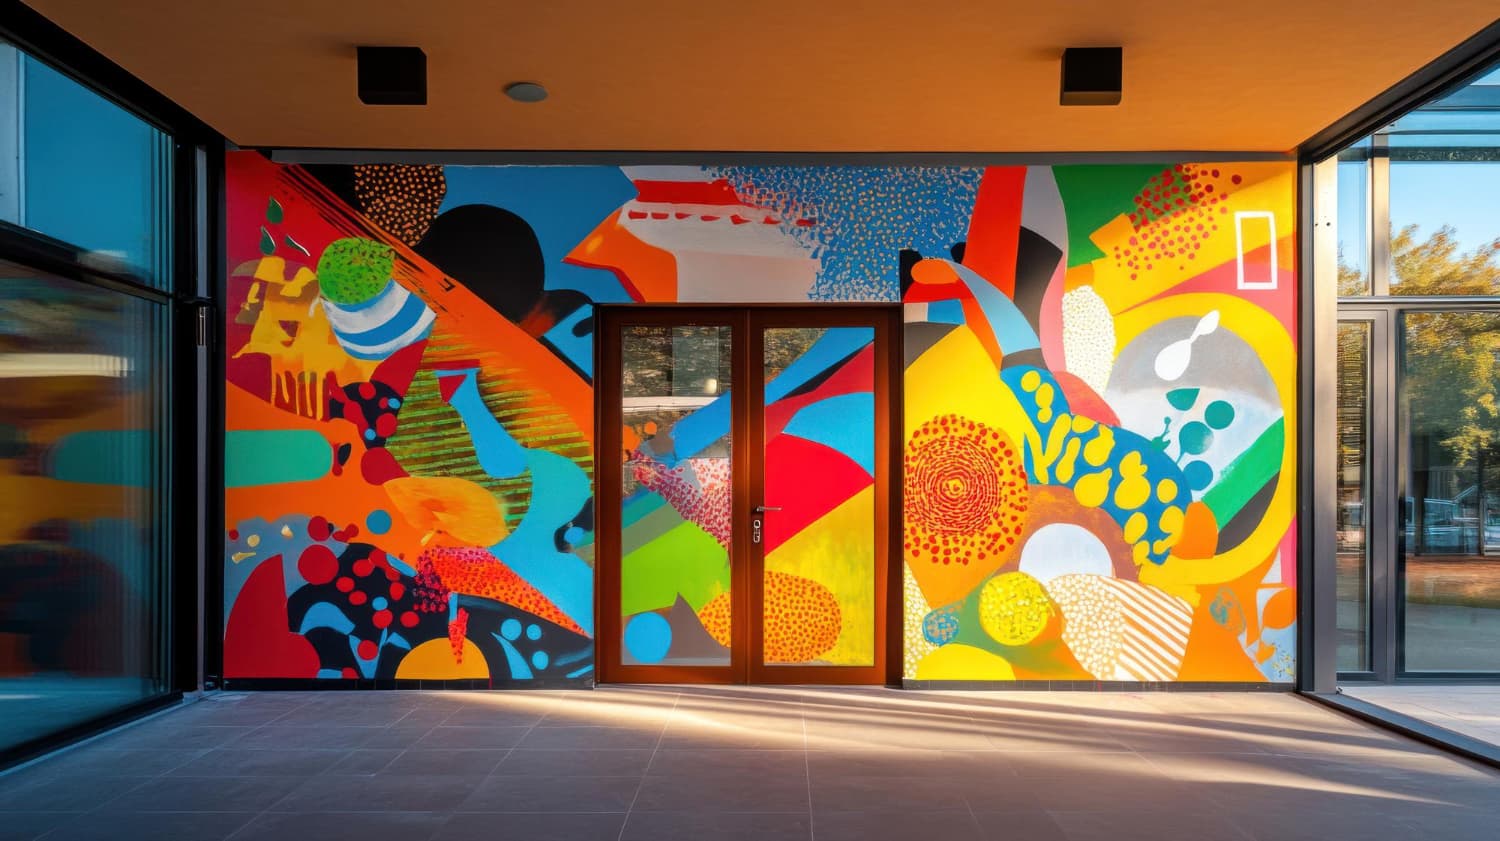
Wall printing around windows and doors works best when the artwork is planned on a measured wall elevation before any design is approved. Mark every opening, frame, switch and socket, keep faces, text and key details clear of them, and let flexible elements such as sky, foliage or texture run around the fixtures instead of being cut by them.
Most walls in real homes and businesses are not clean rectangles. A majlis wall may have a window on one side, a corridor wall may have three doors, and almost every living room wall has a light switch, a thermostat or a television socket. This guide explains how to plan a printed design so those openings become part of the composition rather than a problem discovered on installation day.
Why Does Wall Printing Around Windows and Doors Need Planning?
A direct-to-wall printer applies the design to the surface that exists, not to the clean rectangle shown in a mood board. Any part of the artwork that falls on a window, a door frame or a switch plate is either lost or has to be interrupted. That creates three common problems:
- Important details get cut. A face, a logo or a line of Arabic calligraphy that lands on a door opening simply disappears.
- Proportions look wrong. A design that fills a 5-metre wall on screen may feel crowded once a 1-metre window removes part of the middle.
- Fixtures interrupt the flow. Switches, sockets and air-conditioning controls create small gaps that are distracting if they sit inside a strong graphic element.
None of these problems is unusual. They only become costly when nobody plans for them before the artwork is finalised.
How Do You Measure a Wall With Openings?
Good planning starts with a wall elevation: a simple drawing of the wall face with every opening and fixture placed accurately. You can prepare a basic version yourself and the site survey will confirm it.
- Measure the full wall. Record the width at two or three heights and the height at both ends, because walls are rarely perfectly square.
- Locate each opening. For every window and door, note the distance from the left edge and from the floor, plus its width and height including the frame.
- Mark small fixtures. Switches, sockets, thermostats, speakers, vents and curtain brackets all need a position and size.
- Note what will stay in front of the wall. A sofa, a bed headboard, a console or a television will hide part of the artwork.
- Take photographs. Shoot the whole wall straight on in daylight, then close-ups of each fixture.
If you are not sure what details to collect, our wall printing site survey checklist for Saudi project teams lists the information a survey normally records.
What Are Safe Zones and Crop Lines?
Two simple ideas help designers protect the artwork.
Safe zones
A safe zone is an area of the wall where nothing important will be interrupted. On a wall with a central window, the safe zones might be the two panels either side of the window and the band above it. Faces, text, logos and the main focal point of the design should sit fully inside safe zones.
Crop lines
A crop line marks where the print will stop because of an opening, a frame or a fixture. Drawing crop lines on the design file shows the client exactly how the finished wall will look. It also prevents the most common surprise: seeing part of a key image missing after printing.
Your designer or the WallInks team can add both to a visual mockup so you approve the design as it will actually appear, not as it looks on a blank wall.
Which Design Styles Work Best Around Openings?
Some artwork adapts naturally to interruptions; some does not. The guide below summarises how common styles behave.
- Landscapes, skies and foliage: handle openings very well, because openings read as natural breaks. Keep the horizon line away from window sills.
- Abstract textures and gradients: handle openings very well, as small gaps are barely noticed. Check colour contrast next to frames.
- Geometric patterns: handle openings moderately, as cuts can break the rhythm. Align pattern lines with door and window edges.
- Portraits, characters and logos: work poorly if cut. Place them fully inside a safe zone.
- Typography and calligraphy: work poorly if interrupted. Keep text panels clear of all fixtures.
A useful approach is to treat the openings as part of the frame. A window can become the "sun" in a desert scene, or a doorway can sit between two matching panels so the wall looks symmetrical.
How Should You Plan Around Switches and Sockets?
Small fixtures need their own decisions. Typically there are three options, and the right one depends on the design and the room.
- Print around the fixture. The plate stays in place and the print stops at its edge. This is the simplest choice when the fixture sits in a calm part of the design.
- Move the design, not the fixture. Shift the focal point so the switch falls in a background area such as sky, grass or texture.
- Relocate the fixture before printing. If a socket sits exactly where a key element must go, an electrician may be able to move it. This must happen before printing, never after.
Whatever you choose, decide it during design approval. Discovering a light switch in the middle of a calligraphy panel on installation day usually means either an awkward compromise or a redesign.
What Does the Printer Need Around Edges and Frames?
A vertical wall printer moves along a rail and needs space to work. Near floors, ceilings, corners and deep frames there may be areas the print head cannot reach cleanly. The exact margins depend on the machine, the wall and the surrounding fixtures, so they should be verified on site rather than assumed from a drawing.
Before printing, make sure that:
- Furniture and curtains near the wall can be moved for the printer.
- Window sills, door frames and skirting boards are fixed and finished.
- The wall around each opening is smooth, dry and painted, as explained in our guide on how to prepare a wall for printing.
- Any planned fixture changes, such as moved sockets, are complete.
What Mistakes Should You Avoid?
- Approving a design on a blank wall. Always review a mockup with openings and fixtures drawn in.
- Centring the artwork on the wall instead of the view. The best focal point may be the area people see from the entrance or the seating, not the mathematical centre.
- Ignoring furniture. A sofa or headboard can hide the lower third of the wall, so keep important details above it.
- Placing text near frames. Even if it is not cut, text squeezed against a door frame looks unplanned.
- Leaving fixture changes until the end. Electrical work after printing risks damage to the finished surface.
For broader advice on choosing the right wall in the first place, see our article on wall mural placement ideas beyond the obvious wall.
Frequently Asked Questions
Can you print a mural on a wall with a window in it?
Yes. A wall with a window can carry a printed design, but the artwork should be planned around the opening. The print stops at the frame, so important elements such as faces or text should sit in the solid areas beside or above the window. A mockup with the window drawn in shows the final result before approval.
Do switches and sockets need to be removed before wall printing?
Not always. Many projects simply print around the plates. If a fixture sits where a key part of the design must go, it can be relocated by an electrician before printing. Decide this at the design stage and complete any electrical work before the printer arrives, never after the wall is finished.
What design works best on a wall with several doors?
Continuous, flexible designs usually work best: landscapes, skylines, botanical scenes, gradients and textures. These read naturally across interruptions. Designs that rely on one central image or a long line of text are harder, because each door breaks them. Placing matching panels between doors can also create a balanced, intentional look.
How accurate do my wall measurements need to be?
Your own measurements and photos are enough to start design discussions and request a quote. Before final approval, the site survey should confirm the wall size, the position of every opening and fixture, and the condition of the surface. The final artwork is then adjusted to these verified measurements.
Can the printer reach right up to a door or window frame?
It depends on the frame depth, the wall layout and the machine. Some areas close to frames, corners, floors and ceilings may be harder to reach cleanly. These margins should be checked on site during the survey so the design can allow for them, rather than relying on assumptions from a drawing.
Conclusion
Successful wall printing around windows and doors comes down to planning the artwork first. Measure the wall and every opening, mark switches and sockets, define safe zones and crop lines, and choose a design style that adapts to interruptions. Keep faces and text away from fixtures, account for furniture, finish any electrical changes before printing, and approve a mockup that shows the wall exactly as it is.
Planning a printed wall with windows, doors or fixtures in Riyadh, Jeddah or elsewhere in Saudi Arabia? Share your wall photos and measurements with WallInks and our team will help you plan a design that works with every opening.